

买了windows系统的服务器(VPS)等之后我们需要一个php环境来搭建自己的项目,这里介绍手工在windows server 2012上面配置php环境的具体步骤,适合使用服务器和VPS等的新手。
php 5.6.12
下载地址:http://windows.php.net/downloads/releases/php-5.6.19-nts-Win32-VC11-x86.zip
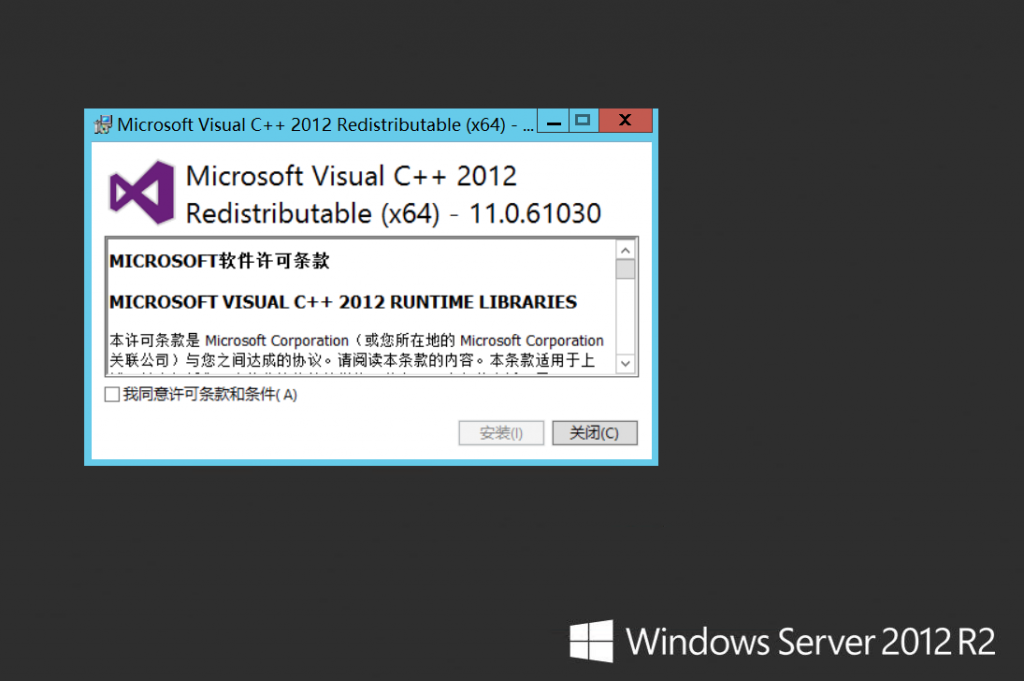
Visual Studio 2010 动态链接库(64位系统两个都要装,如果不装就会出现msvcr100.dll丢失问题,导致500错误)
下载地址:http://download.microsoft.com/download/9/C/D/9CD480DC-0301-41B0-AAAB-FE9AC1F60237/VSU4/vcredist_x64.exe
下载地址:http://download.microsoft.com/download/9/C/D/9CD480DC-0301-41B0-AAAB-FE9AC1F60237/VSU4/vcredist_x86.exe
首先,下载安装Visual Studio 2010 动态链接库
在C盘根目录创建“php”文件夹
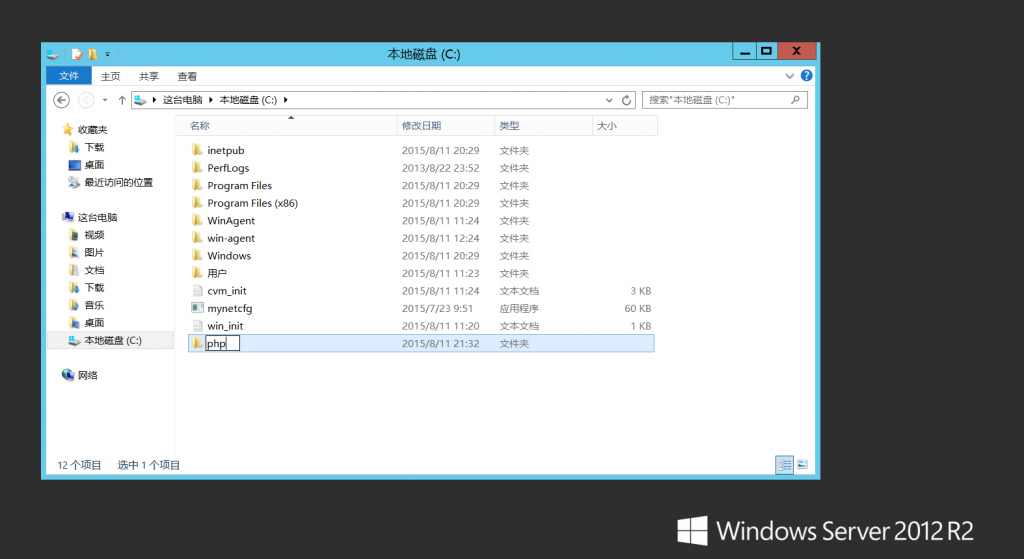
将下载到的php文件全部复制到“php”文件夹中
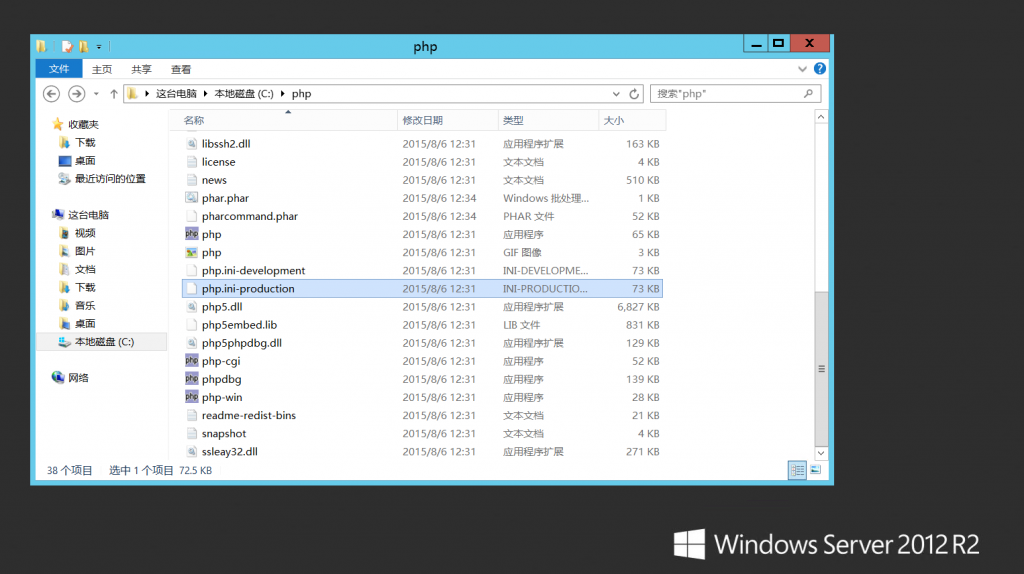
复制“php.ini-production”并改名为“php.ini”
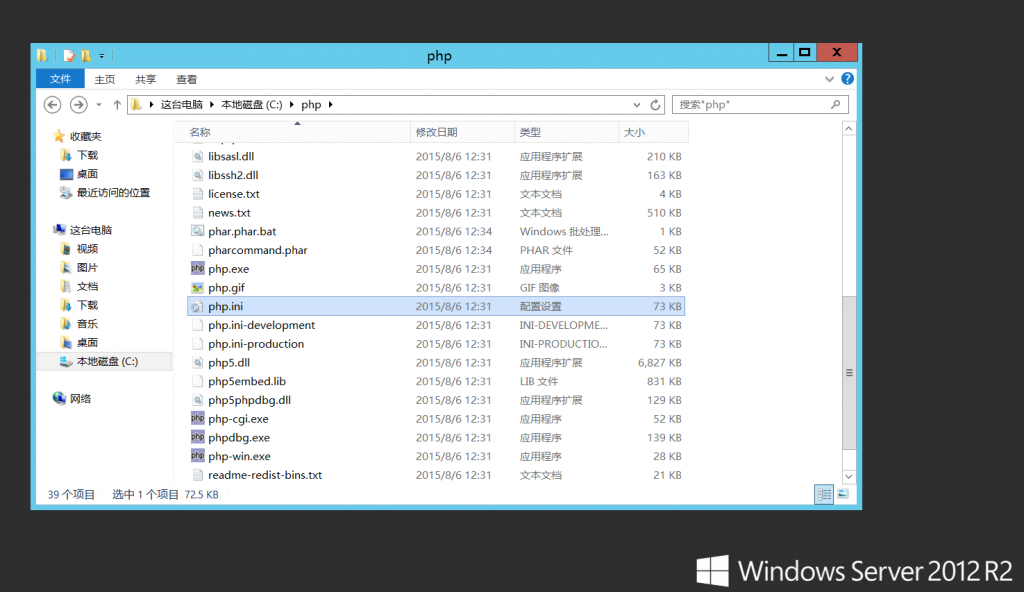
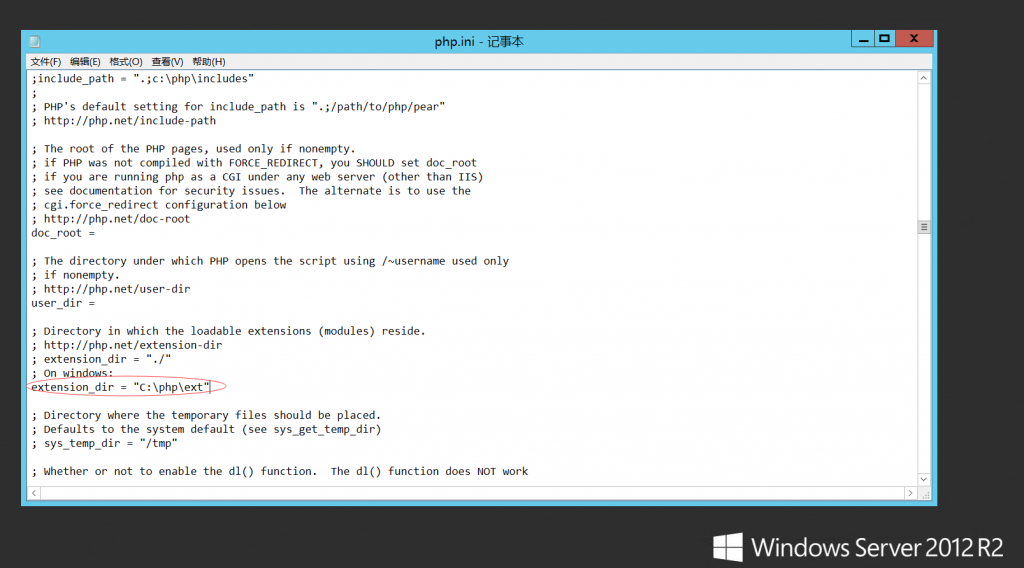
用记事本打开“php.ini”,设置php模块路径
extension_dir = “C:\php\ext”
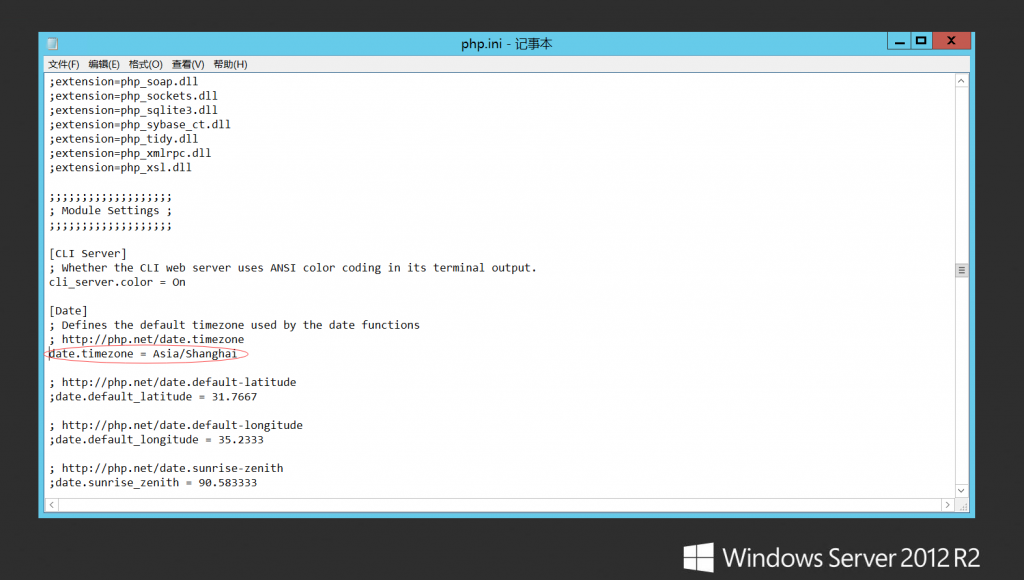
设置php时区
date.timezone = Asia/Shanghai
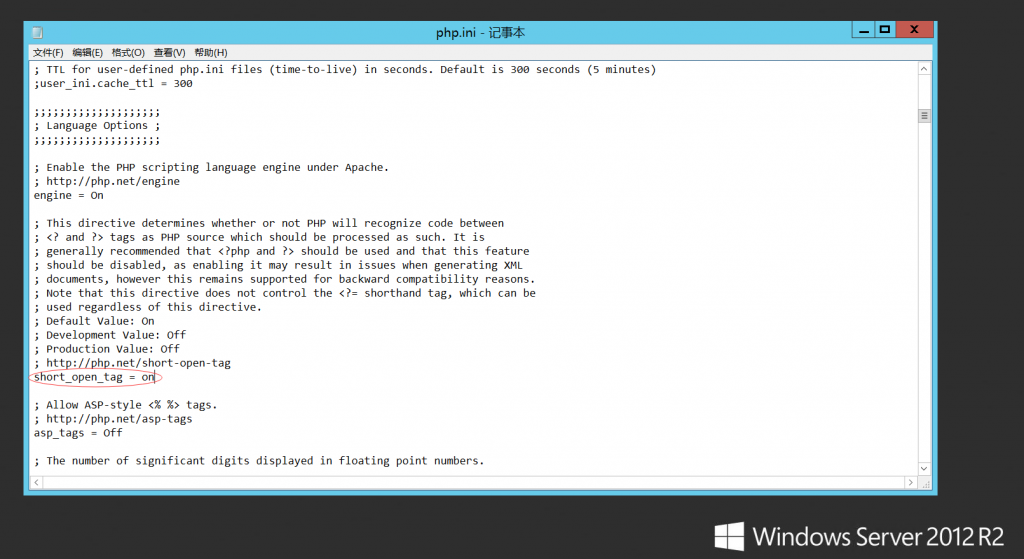
开启php短标签
short_open_tag = on
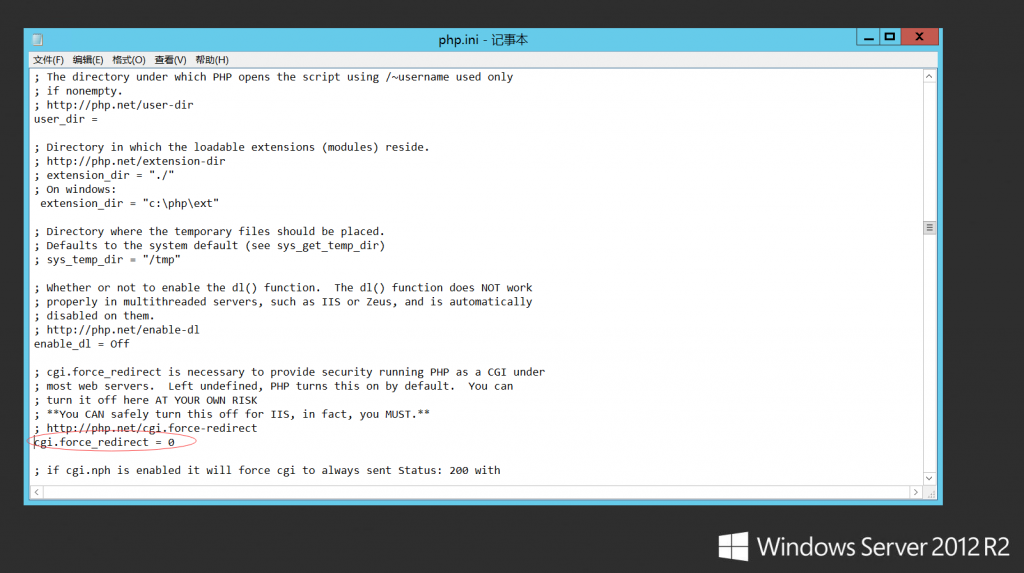
以CGI模式运行PHP
cgi.force_redirect = 0
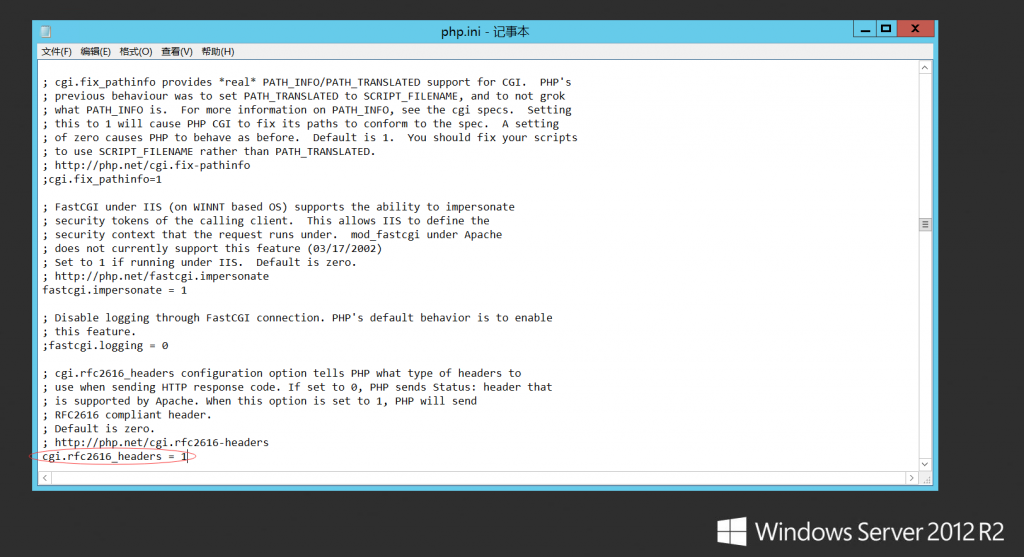
fastcgi.impersonate = 1
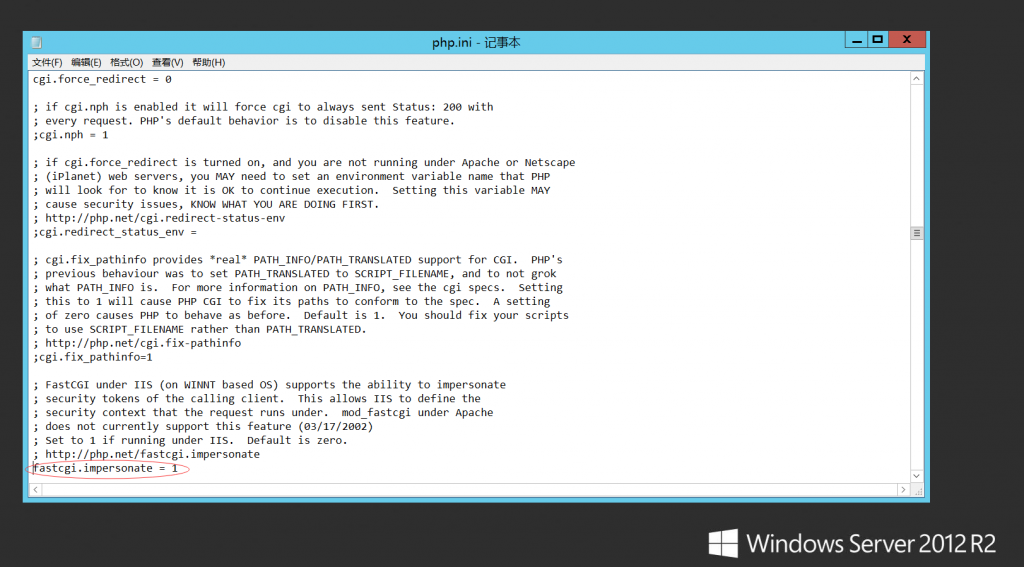
cgi.rfc2616_headers = 1
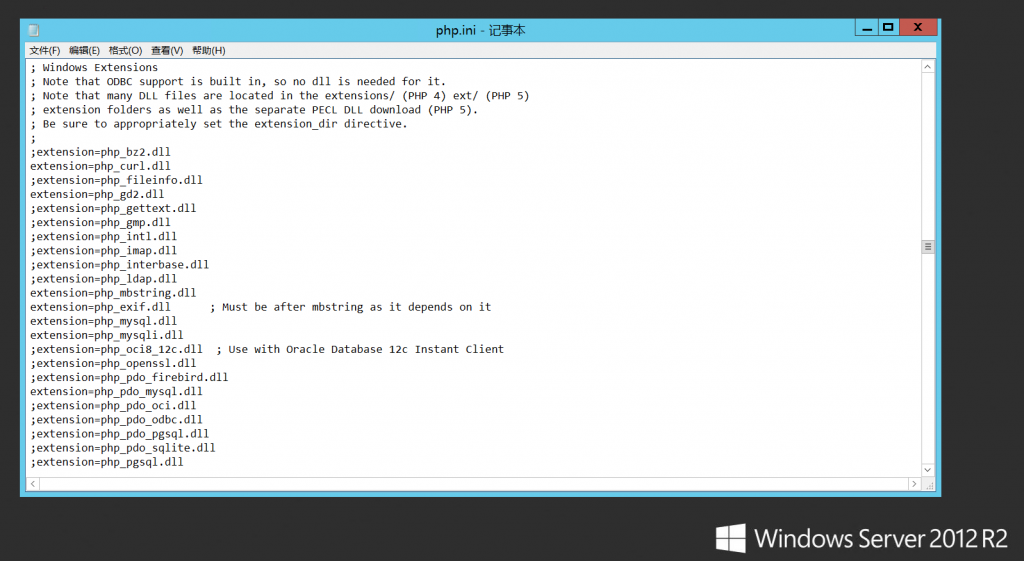
PHP拓展板块,按需开启
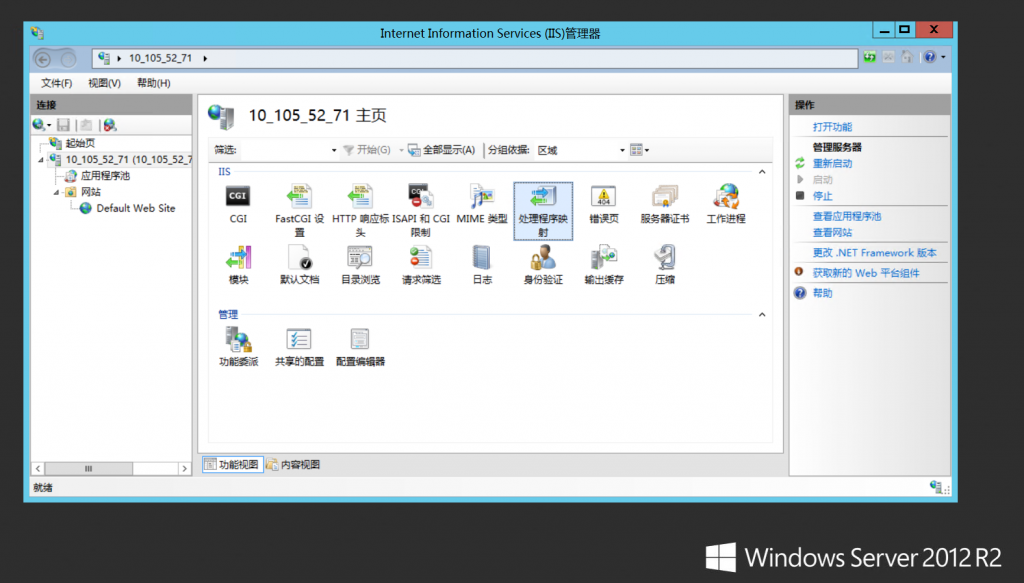
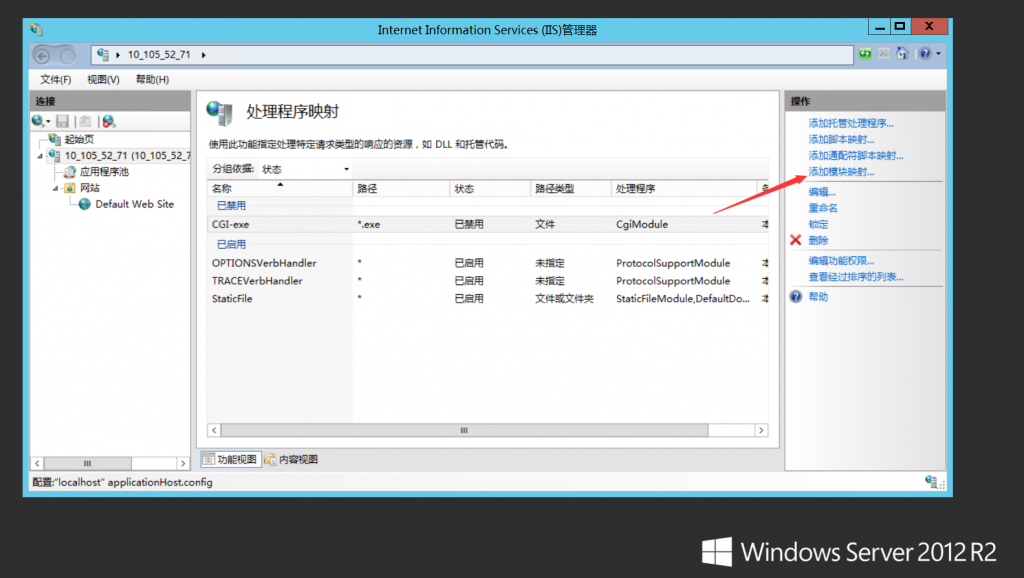
进入IIS控制面板选择主页,单击“处理程序映射”
单击“添加模块映射”
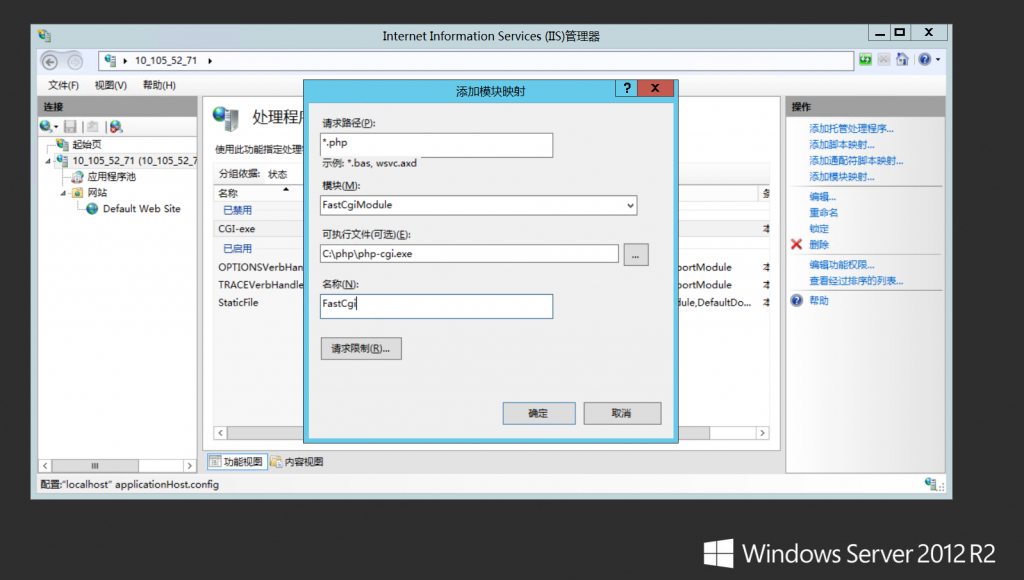
输入内容后单击“确定”
请求路径:*.php
模块:FastCgiModule
可执行文件(可选):C:\php\php-cgi.exe
名称:FastCgi
没有找到FastCgiModule模块的解决方法在帖子的最下方
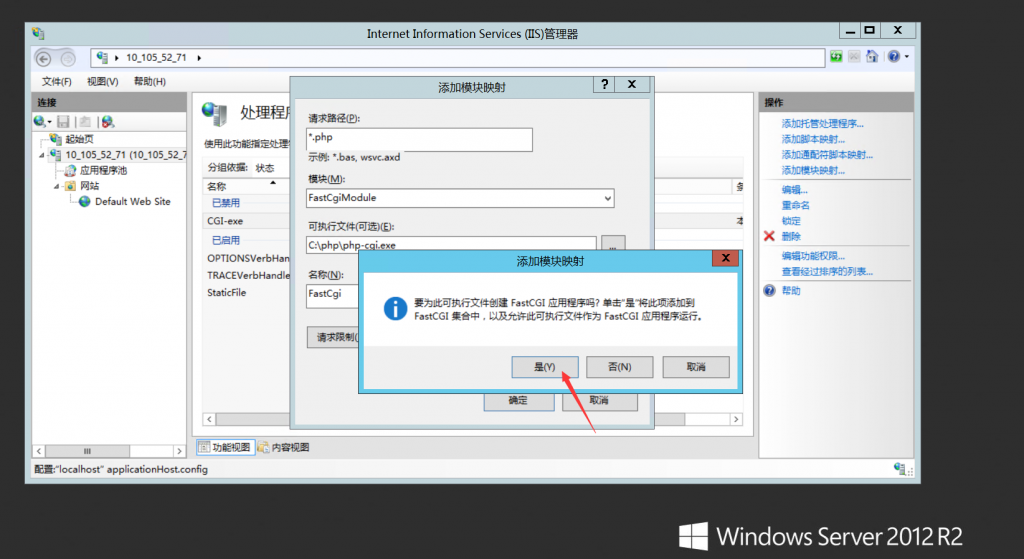
单击“是”
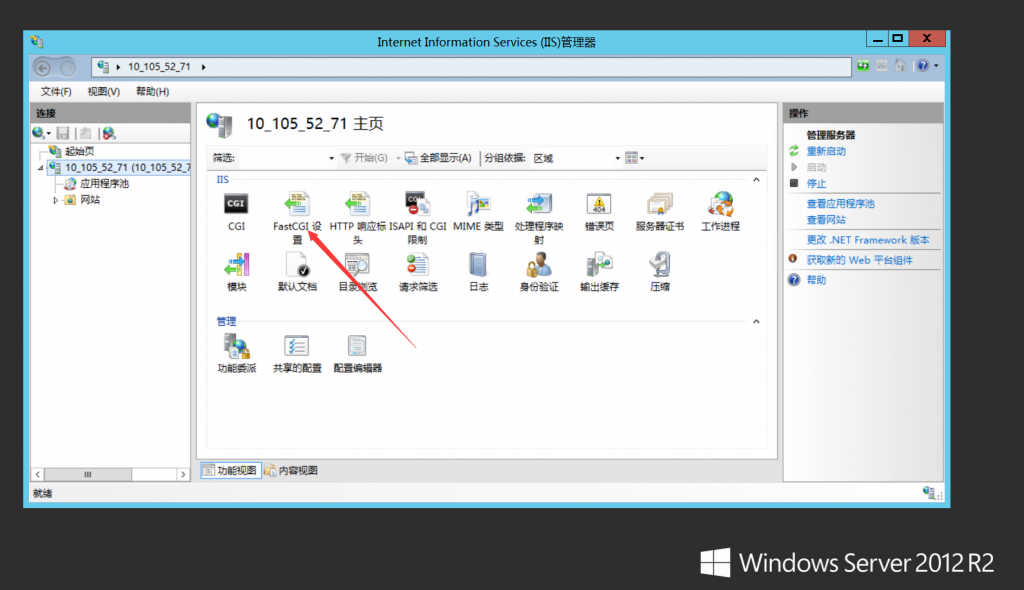
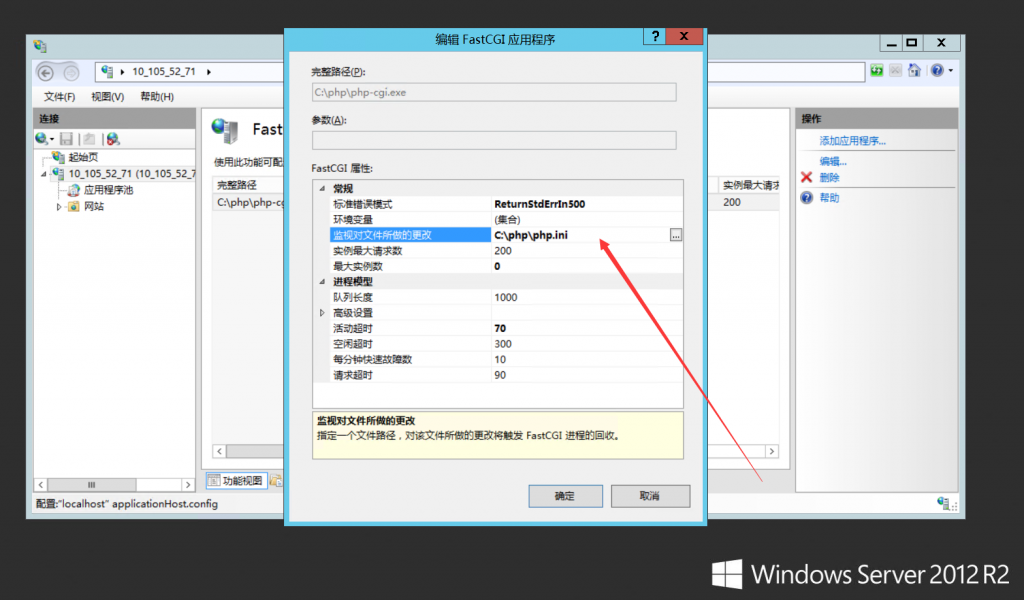
单击“FastCGI设置”
右击点击“编辑”

将“监视对文件所做的更改”改为php.ini的绝对位置 C:\php\php.ini
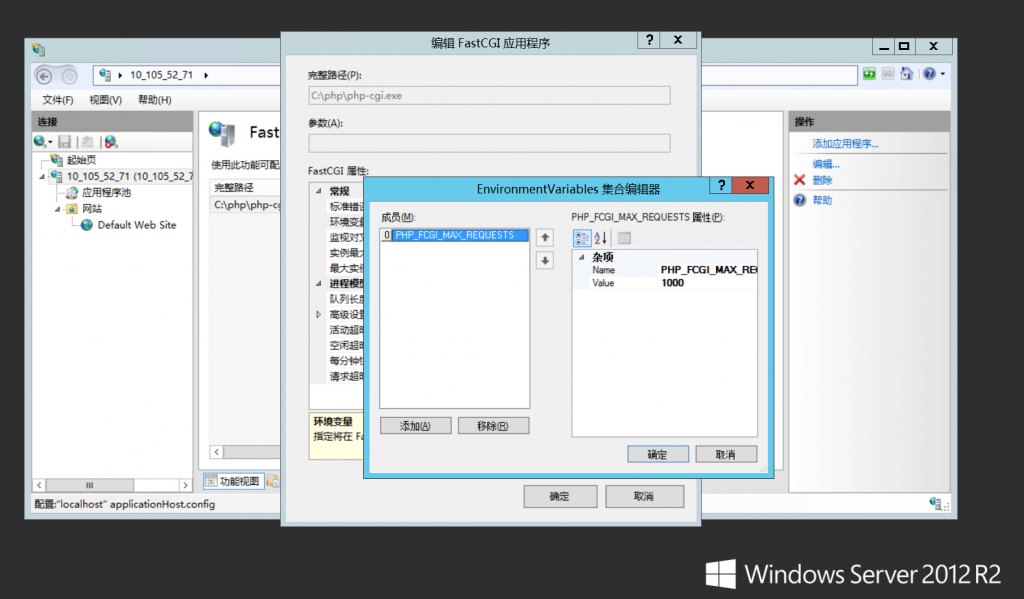
单击“聚合编辑器”右边的按钮

添加信息,单击“确定”Name:PHP_FCGI_MAX_REQUESTS
Value:1000
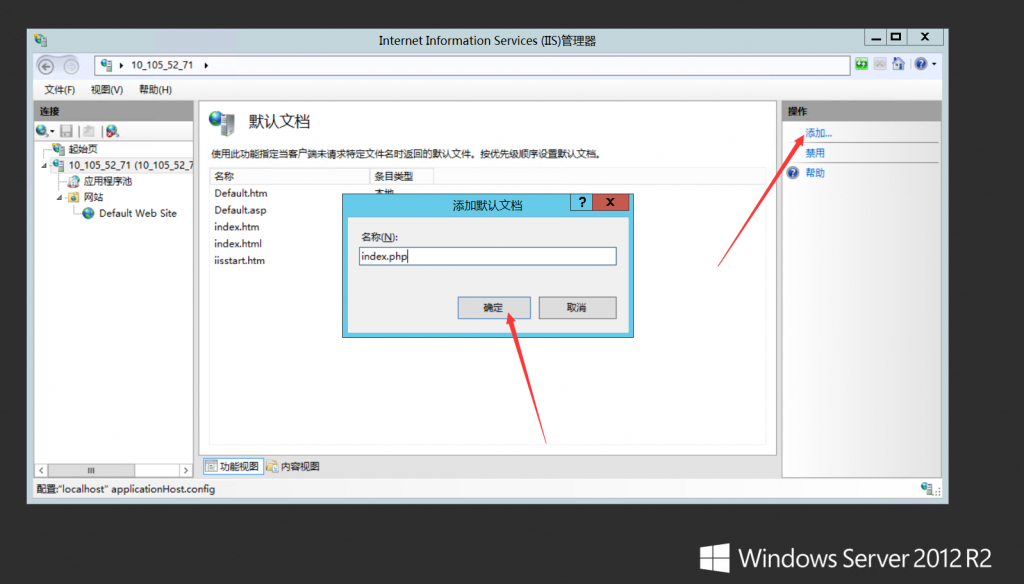
在IIS控制面板中,单击“默认文档”
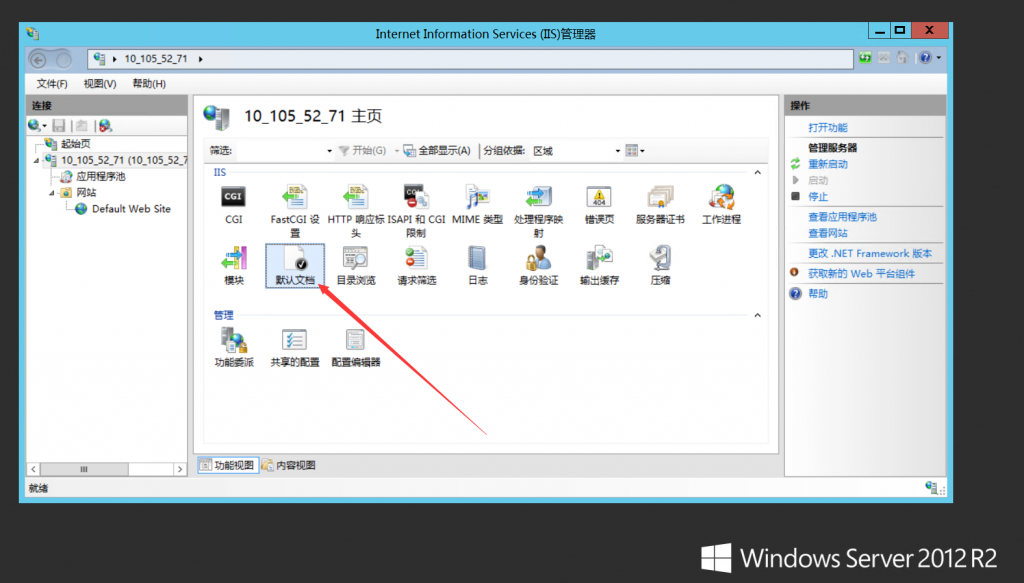
增加“index.php”
在默认的站点下新建一个名为“index.php”的文件
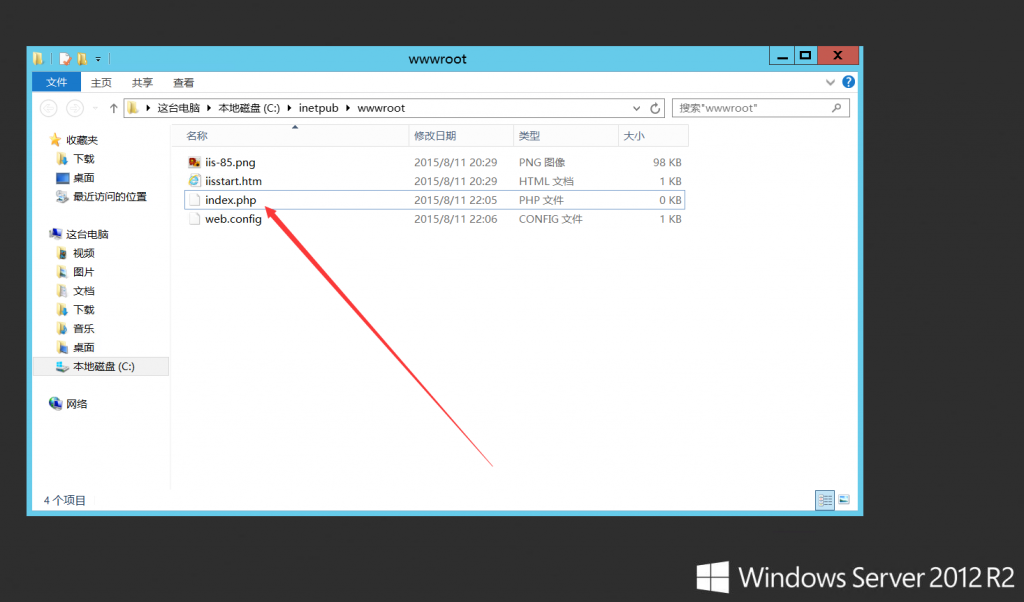
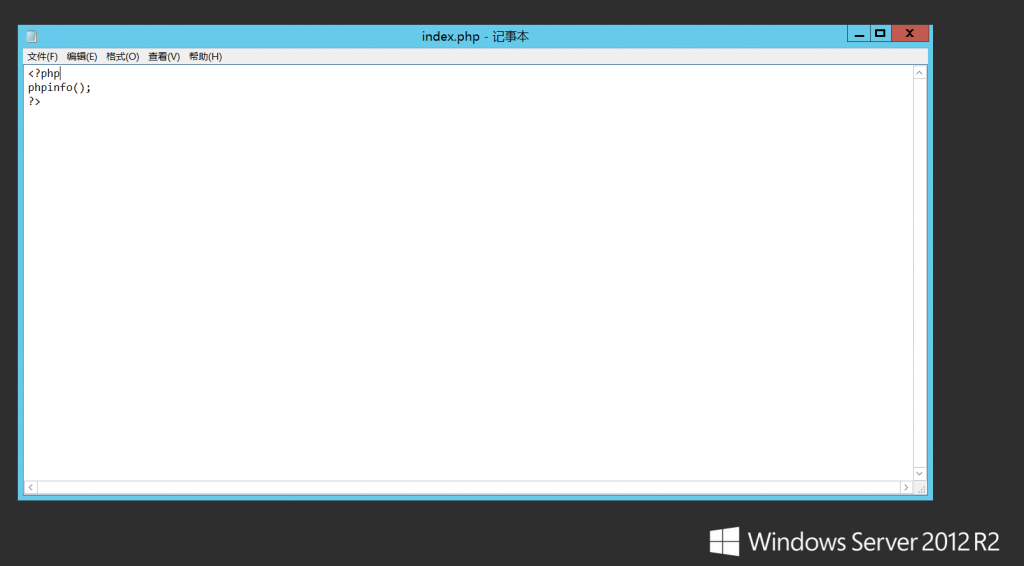
编辑“index.php”,测试PHP信息,保存退出
phpinfo();
?>
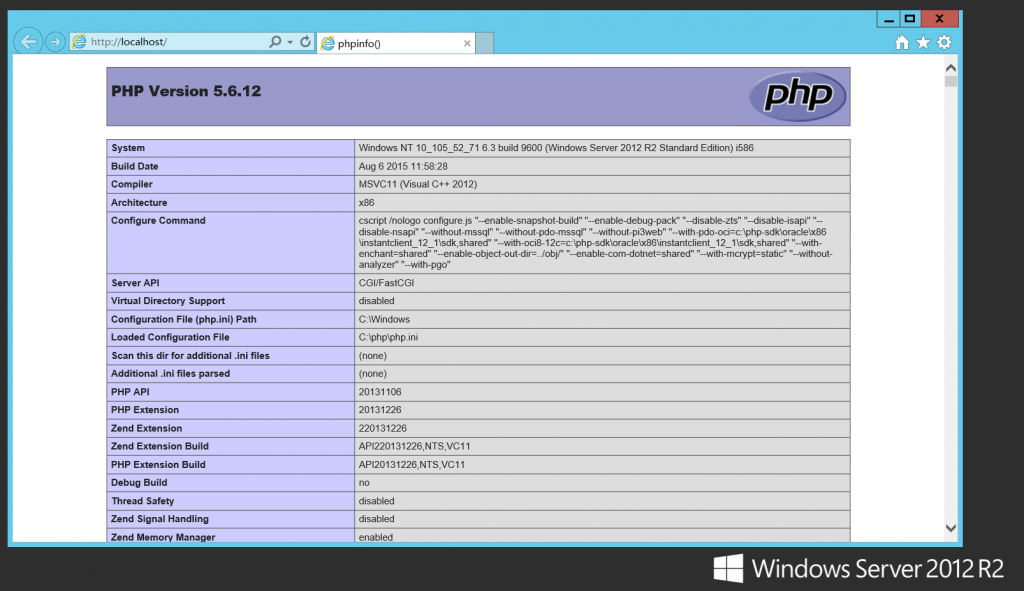
访问 http://localhost/ 成功配置PHP
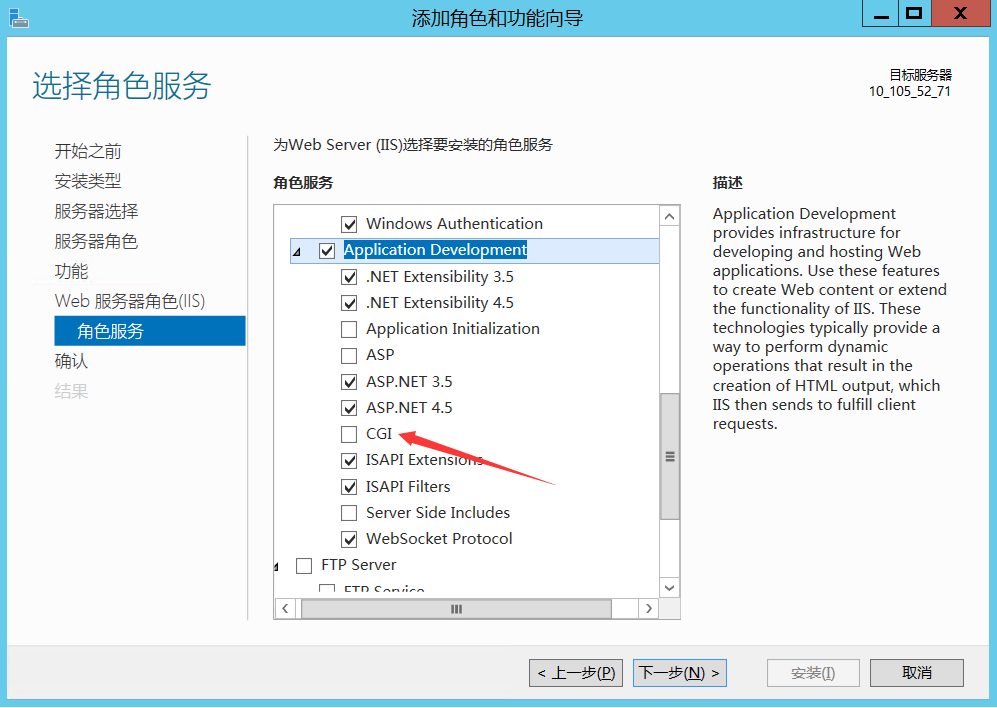
注:有些小伙伴可能找不到“FastCgiModule”板块,那是因为没有安装CGI,只需要在“添加角色和功能向导”中选中CGI并安装就可以了


评论前必须登录!
注册